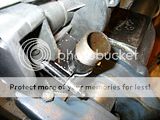
Anybody out there seen a better motor mount?

retromike3

Member
Local time
11:28 AM
Joined
Nov 23, 2008
Messages
409
I have had two engines brake at the rear mount. The second one I thought I fixed with grade 8 bolts but then the casing broke I was hoping I could make something that I could weld to the bike frame to make it stable. I think the problem I had at first was that the bolts I used were two long(I was lengthening the rear bolts so I could get the chain the right length).I think this caused too much vibration and wound up braking my block at the mounts.

mike

Nothing wrong with the mounts them selves...the problem is that you didn't or don't know how to mount a engine properly. Using a engine mount to adjust the chain??? You are kidding aren't you. No wonder they broke.

http://s982.photobucket.com/albums/ae309/Ron-Becker/Engine Mounting/

http://www.motoredbikes.com/showthread.php?t=29050
 
Last edited:
Zoom Cycles ? has a plan for home made mounts. They are made of steel strapping
[ hardware store ] 6 foot length. You need a foot, make more for sale ? Drilling holes isn't bad if you use progressively larger High Speed Drill bits, center punch first !
After holes are drilled, use hacksaw to cut steel, and there's your mount ! If you drill after cutting, your stuck holding small pieces. Drill first, than cut. A cut off wheel, or chop saw chomps through in seconds.

:-/

Didnt see the plans ..could You provide a link??

Cheers
 
Couldn't find link, will try to explain how

Couldn't find link, will try to explain. 1 1/2 " x 1/8 Steel strapping about
6" long is fitted to downtube, best to bolt through downtube. This is
what engine mounts to. I'd keep the seat post rear mount adjustable.

The strapping can be bent cold in a vice, I'd warm it up with a
MAPP torch if complicated bending is required to clear an
Areodynamic Downtube.

A rigid front mount keeps sprocket centerline true. Rubber Washers,
and Elastic Stop Nuts would compliment installation

For the Ultimate mount, Silver Braze strapping to downtube.
After centering with through bolts, Paint to match
 
I have had two engines brake at the rear mount. The second one I thought I fixed with grade 8 bolts but then the casing broke I was hoping I could make something that I could weld to the bike frame to make it stable. I think the problem I had at first was that the bolts I used were two long(I was lengthening the rear bolts so I could get the chain the right length).I think this caused too much vibration and wound up braking my block at the mounts.

mike

There is NO reason a mount should break. Mounts, studs break only because the installer does not know how to/ can't do it properly. I have in 5 builds, never broke a mount, stud or striped a hole. First what needs to be done is replace the cheap studs and nuts with metric grade 8.8. (not bolts). I use locktite and the proper engine mount torque is between 50 and 70 inch pounds, I use 50 INCH pounds. Also nice is use two nuts on each stud. I use a regular nut followed up with a nylock nut and use as a jam nut.

Improper fit/instillation is the major cause of mount, stud, and or thread failure. For a proper fit the bike frame "V" needs to be at a 75 degree angle.


The engine needs to be mounted to the frame, and not the frame to the engine. The rear mount is mounted first. Here you will see (jig in vise same size as down tube) that there are NO gaps between the down tube and engine mount. The spacers between the clamp and nuts enables a socket to fit properly over the nut, without hitting the clamp, thus easier for a proper torque.


In cases where the frame isn't a perfect 75 degrees a front mount needs to be fabricated, there are many ways to do this. Here is one.


If possible NEVER DRILL A HOLE IN A BIKE TUBE. You are inviting trouble..

Yes that frame completely cracked in two. That check can be pulled from inside the frame to outside (and I'm not a illusionist). This happened while riding, however lucky, it was done at about 3 mph on my 135# son.
 
Last edited:
I use head studs

I have had two engines brake at the rear mount. The second one I thought I fixed with grade 8 bolts but then the casing broke I was hoping I could make something that I could weld to the bike frame to make it stable. I think the problem I had at first was that the bolts I used were two long(I was lengthening the rear bolts so I could get the chain the right length).I think this caused too much vibration and wound up braking my block at the mounts.

mike

I had two motors that the rear right mount broke (bot flush w/ engine). The first one I jerry rigged w/ JB weld and some pipe clamps..worked for a while, but I think the excess vibrations damaged the internals (rode about 100 miles). This on was installed by someone else. The second time same stud broke and I had to hold my engine in place with my legs to get home (good thing I was wearing jeans and boots). I still have this motor in my basement waiting for me to find time to get that stud out. It has a broken carbon drill out stuck in the stud and that is flush too. I think I did not drill pilot hole deep enough, I was worried about drilling too deep and damaging threads on motor (rode about 150 miles). My current everyday ride had the mount studs replaced with SBP 6mm head stud kit. These studs to bow a little when tightened, but not enough to affect bolt removal/adjustment. I have had no problems with the mounting. I use no dampening material. I mount straight to the frame (current about 750 miles and still going). Furthermore the SBP studs are long enough to make two sets of mounts, or there is enough for intake/exhaust mounting studs if you prefer. For mounting intake/exhaust I opt for allen head bolts from Home Depot.
I have attached a photo of how my rear mount is set up w/ a bolt and washer for spacer.
 

Attachments

  • rear mount_port side.JPG
    rear mount_port side.JPG
    232.7 KB · Views: 310
If you have access to a welder, a vice, hack saw and a drill you can make a mount out of some 1/4 thick 1x1 steel stock. I used a "universal U-bolt mount" as a template. cut two out of the stock, bolted them to the motor with some 5mm allen barrel heads the rear with out the "arched spacer" and alinged the motor square in the frame and with an angel finder.welded the mounts to the frame. I havent had a problem with any losening or vibration.
 
Back
Top