Intake manifold

SPJ

New Member
Local time
8:06 PM
Joined
Apr 29, 2008
Messages
26
Hi folks, I've been reading about the importance of some of the modifications necessary to both the WC-1and the NE-5 Whizzer engines to make them more reliable and boost the power output. I've been working more on preparing
my old bike to receive the NE-5 I bought than paying attention to the engine. So today I removed the side plate to see exactly what version of the NE-5 I have. I found the camshaft had been advanced one tooth. I also found factory mushroom type lifters ( I need to lighten them and have the rockwell/hardness checked per advice on this forum ). Found a copper head gasket .So far so good. I also noticed that the intake port had been sleeved down to 3/4 inch from 1 inch. this seemed a bit unusual to me, anyone else find this sleeve or bushing in their engine . Seems to me it would have been better to bore it 3/4 to begin with rather bore it and then sleeve it. Any comments would be appreciated . Thanks to all on this forum for sharing their tips and knowledge.


NE5 details

Hi SPJ, from the things yo've said your engine would be late 07-08 version. The cams were advanced on some engines 06 and up. Copper head gasket I'm thinking late 06 and up.

Now the intake sleeve.....apparently it is very difficult to flow the aluminum throughout the molds without any air pockets, so the sleeve is a perfect way to insure there would be no pin-holes, AND a nice smooth interior, because that is the way that tubing is already made. In a way, tho a little extra work, the best of both worlds.


Your NE should be just fine.

Mke
 
Hi SPJ,
The very early NE motors [with the 26 MM carburetor] didn't use the tubing, but instead had the intake port bored into the cylinder. The early units had the same size port, but often the rear center head bolt hole extended into the port and caused a leak. Also as Mike stated some of the ports contained air pockets. You can blame me for the aluminum tube installed in the port because it was my idea to improve the flow via a smooth port and seal the rear head bolt hole at the same time.

Now a few important comments concerning the mushroom lifters [also my idea, but Whizzer altered them from my original design]. My original design was much lighter, had a level and much smaller [height] base. My advice is to forget the Rockwell test because you will be disappointed in the results.

Here are the actual results of the hardness test, they are all "soft", and some are hard on one end and soft on the other. When the machine shop called me about the Rockwell tests on 4 sets of mushroom lifters I had sent [3 stock sets , and 1 modified set], I was somewhat puzzeled by the results. When they told me the modified set was harder at the base, I expected it to be the other way around because I had machined the base. And when they told me the remaining 3 stock sets tested differently, it became even more of a mystery, because one set was harder at the base and the other 2 were harder at the top. I already knew they were soft because I used a regular drill bit in my lathe to drill the centers out, and the drill cut like a "knife through hot butter", and when I reduced the base height it didn't require a special carbide tool bit.

While it is true the softer mushroom lifters will not last as long as hardened versions, I think they will last for a long time [thousands of miles]. The only short term problem that may arize from the softer version would be wearing in one spot and not allow the lifter to spin [rotate]. The new lifters we [EZ Motorbike] had made are heat treated and are very hard, I know this because I tried to alter a couple sets for my special motors. I tried to remove a little extra from the center, and reduce the base a little more [for wieght reasons], and found it difficult to do. I gave up on removing more from the center because my drill bit only smoked and turned blue in the process, and I used a grinder to shrink the base a little more. I don't suggest anyone alter our current lifters, because I was only trying to find out how far I could "push the envelope" for performance.

If you want to machine your original mushroom set, here are the specs and methods to make them better, lighter, and durable. First let me cover the problems, they are way too heavy, the base is too large, and some have the base ground at an angle. Use a 3/16" drill and deepen the center hole within 1/4" from the bottom. Check the base to see if level, I use a mill or lathe with dial indicaters, but a simply way it to chuck up in a lathe and use a tool bit to level the base. Do not shorten the lifter any more than is necessary when leveling. I have seen some of the original lifters over 1/16" [.0625"]off level, making it impossible to adjust the lifter clearance correctly. When reducing the height of the mushroom, take metal from the top of the base. When you are done the mushroom lifter will weigh less than the WC-1 or NE replacements, will remove a lot of stress on the valve train, reduce the valves "slamming" the seats. The mushroom lifters also remove stress on the "C" clip and valve stem because the lifter "rolls" over to the flat side of the lobe as opposed to "dancing" down the ramp. For this reason using mushroom lifters on a WC-1 motor may extend the life of the motor by making a softer landing between the valve head & valve seat.

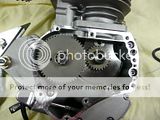
I will include a picture showing the difference between our "enhanced" version and an original mushroom unit.

Hope this information is helpful, and is not intended to bash anyone, any company, or any product.

Have fun,
 

Attachments

  • Qlift&StockM.jpg
    Qlift&StockM.jpg
    36.1 KB · Views: 337
Last edited:
Hi folks, Thanks to both Mike and Quenton for their usual well informed responses. Mike you where dead on about the 07-08 version date. This engine was originally sold by a dealer in 10-2007, I purchased the Whizzer kit from the original owner early in 08 as he was unable ,due to health reasons to make use of it. Please don't take my remarks about the intake port wrong, I wasn't finding fault ,I just thought it was an unusual and more costly production technique. I hadn't taken into consideration the proximity to other holes or possible voids in a critical area. As for the lifters ,well I need to remove them and take a very close look at them to see where I go from here. Thanks again for the information.

Steve
 
Hi SPJ,
All late 2007 and all 2008 [all 2008 were early, because Whizzer stopped production on the NE5]had many updates not present on earlier versions. Here are some additional facts you might find interesting. At the same time they installed the aluminum intake manifold they started installing the "mushroom" style lifters. If I were to guess, I would suspect less than a few hundred of that version were produced [just a guess, not a fact]. As far as I know they also had the copper head gasket, and hi-flow muffler insert installed on the last versions of the NE5. Sure was nice to use all the upgrades on the end of the production run. The last edition of the NE5 motorbike fixed most, but not all of the problems, however it takes less effort, and money to make it durable. Here are "known" issues with the final production NE5 models, some cylinders weren't cured correctly and the head bolt threads "shear", the automatic clutch bearing race is too soft, the lifters aren't "all they can be", and the aluminum intake manifold seldom lines up correctly with the intake port [kinda like a built in restriction].
In order to correctly cure the aluminum, the cylinder should be placed in an oven @ 325 degrees for 2 hours, then let cool normally. There are many posts about modifying the clutch hub to make it "bullet proof". And I have also posted several articles about modifying the lifters. The only item left to discuss is the mis-aligned intake manifold, in many cases removing and rotating the manifold will make it fit closer, and in some extreeme cases a little time spent with a Dremel grinder is needed to match up the manifold.
Hope this information is helpful, and isn't intended to bash anyone or any company.

Have fun,
 
Last edited:
Hi folks, Thanks again Quenton for the additional information. The only issue I may have difficulty dealing with is the heat curing of the aluminum cylinder . In order to get the cylinder in my wife's oven I'd have to hide it inside a turkey:D. Seriously though, wouldn't running the engine at normal operating temperature for a couple of hours produce the same results? Assuming the compression hadn't been raised by milling the head ,placing additional stress on the threads to the point of stripping. I am assuming (perhaps incorrectly) that each engine has had at least a brief test run,before it left the factory,that should have blown the head gasket if the torque on the head bolts due to a bad thread was too low. Perhaps I assume too much:unsure:

Steve
 
Hi SPJ,
I consulted metal experts about the curing, and sadly was informed running the motor in most cases would make it next to impossible to ever cure it correctly. I also thought, like you, the heat produced from normal operations would cure the metal, but two different companies verified that I was wrong.
Sometimes I discover "fixes" by accident, as is the case with this problem. After the second cylinder on my Ambassador ended up with stripped head bolt holes, I installed a cylinder that I just finished reworking for a race motor [while waiting for another replacement]. It was from the same run of cylinders that was originally installed on my Ambassador, but as always I paint the cylinders black [for 2 reasons, tests show a reduced operating tempature, and looks more like the vintage motor]. For years I have been "baking" the paint on in the oven without realizing I have been curing the aluminum in the process. When the experts told me to "cure" in the oven @ 325 degrees for two hours and let reach room tempature before handling, you can imagine my surprize when I realized I had been doing exactly that all along.
As far as "assuming" each motor is tested at the factory, I can assure you nothing is farther from the truth. I have opened many new motors, and not a single sign of ever being fired is the norm. But I have also opened motors that appeared to have been test run for a short period of time. It is also important to note that not all cylinders are cured incorectly. The earlier NE cylinders didn't have this problem and possibly the current versions may also be exempt from this issue. If you find the rear 8 MM and the side 10 MM bolts keep working loose, you might want to put the cylinder inside a "turkey" after all. Never tighten the bolts when the motor is hot, let it completely cool before torquing the bolts.
The following comments are strickly my opinion, and not absolute. I have never seen any internal combustion motor use different size head bolts, and I have a hard time understanding how you can torque part of the head at 210 inch pounds and the rest at 175 inch pounds. I also have a hard time understanding why some head bolts have washers and some don't. After investing in a large number of replacement head gaskets over the last several years, I started exchanging the larger 10 MM bolts for the smaller 8 MM versions and haven't blown a head gasket since. For anyone interested, here is how I did it, I used a 8 MM X 1.25 heli-coil tap in the 10 MM holes, installed two heli-coils in each hole. I then machined two small aluminum sleeves to fit into the larger holes in the head, installed 8 MM bolts and therfore all the bolts were the same size [8 MM]. When I contracted to have quality aftermarket heads produced I had the vendor make all the holes in the head to the 8 MM size.
One problem that concerns me on the newest motors is the amount of metal between the valve "block" and the rear head bolt is very small, and the head gasket is made with a "bridge" that crosses between the valves & the piston [directly in the combustion path]. Maybe the vendor in Tiawan knows more about the flat head motor than all the engineers worldwide have discovered in the last 100 years. I personally am excited to see the results of moving the spark plug forward, removing fins from the head, a head gasket with the "bridge", two different size head bolts, and the oval shaped valve seat block.
Now some good news, the earlier NE cylinder & head [2005 to early 2007]will bolt directly onto the current production motors. Ralph at Woodstock Whizzer makes a cast iron replacement cylinder, and I am currently looking into the possibility of producing an aftermarket kit to convert the earlier WC-1 motor [which will also fit all new edition motors].

No matter what happens, remember we can help you make it "bullet proof" with little effort.

Have fun,
 
Back
Top