make your own torque pipe

  • Thread starter Deleted member 12676
  • Start date
The construction plans gives the website you can use to get printouts for each section.
I don't use stainless because it is harder to weld. Not necessary anyway because the inside is oily and the outside can be painted.
 
Hi,

I am in the process of attaching my 49cc HT to my bike and realized that the factory exhaust will not fit on with my frame, instead of modifying the factory one to fit i might as well make a decent pipe to fit, this looks perfect!

Will it work sufficiently with the stock motor? or will i need other mods to make it work?

(i realize it will be better in conjunction with other mods but will it be better than the stock one before i get around to doing other mods?)
 
For the most perfect power the pipe has to nearly exactly fit the port durations, but even if it don't it will be an improvement over the stock pipe. Then when you switch to using a reed valve you will get another substantial increase in power.
 
Great thanks, ive now started a pipe going by your plans, will let you know how it goes :)
 
I think it may be helpful if you share what it's like to make your own pipe for the first time. It would be encouraging to the people subscribed to this post that want to do the same but are hesitant.
 
Good idea

I have had a little bit of metal work experience, did metal work at school and made/customised a few bikes since then, but never any sheet metal forming experience.

I used a MIG welder but it would be much neater with an oxy/acetaline or TIG.

The straight sections i happened to have steel exhaust tube laying around that was the right size, for the cones i cut them out of a piece of sheet metal from the roof of my old car where i installed a sunroof

First i drew the cones out to the measurements in the plans:
2012-12-29122901.jpg


Then cut them out with a jigsaw:
2012-12-29123141.jpg


2012-12-29123301.jpg


then i used a hammer and various bits of tube in the vice to hammer the cones into shape:
2012-12-29123350.jpg


once they were close i finished them off with my hands and a pair of multigrips, once the cone matched the tube it was to be welded to i tacked around the edge a few times to make sure it all stayed straight:
2012-12-29135807.jpg


Before seam welding all the way around to seal it up:
2012-12-29140124.jpg


once it was all welded i neatened it up using a bench grinder and an angle grinder, then moved onto the next section:
2012-12-29141022.jpg


Thats where im up to for now, i will continue the build tommorow once ive got the thinner pipe for the inlet
 
I really like the photos.
Can't wait to see all of the photos of the assembly and welding process and the completed expansion chamber; painted and installed on the bike.
 
Ok i got impatient and couldnt wait till tommorow to continue :p

Next was the stinger, once again cut out with a jigsaw, and bent to shape with a combination of hammer, vice, hands and multigrips, i then drilled a 12mm hole in the body and lined the stinger up:
2012-12-29150742.jpg


Before tack welding then finishing a seam right around:
2012-12-29150755.jpg


Then grinding it to look kinda nice-ish (MIG welding is not very neat at all in this situation, or maybe im just not skilled enough)
2012-12-29153216.jpg


Then the final cone was bent up and welded along the join:
2012-12-29160328.jpg


before i test fitted the whole shebang on the bike, this pic shows that the last cone needs to be on an angle to line up with the frame:
2012-12-29153840.jpg


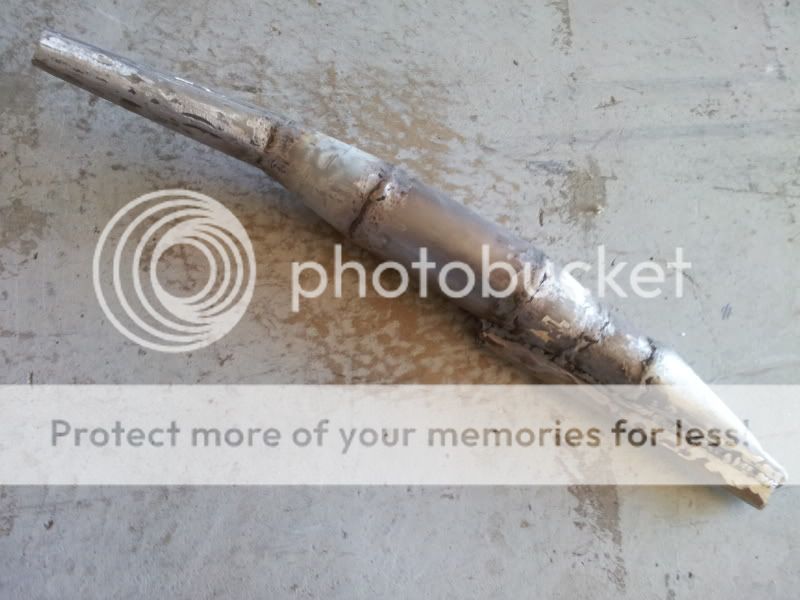
Once id figure the angle out i tacked then welded the last cone on:
2012-12-29161554.jpg


Before grinding it smooth again:
2012-12-29163018.jpg


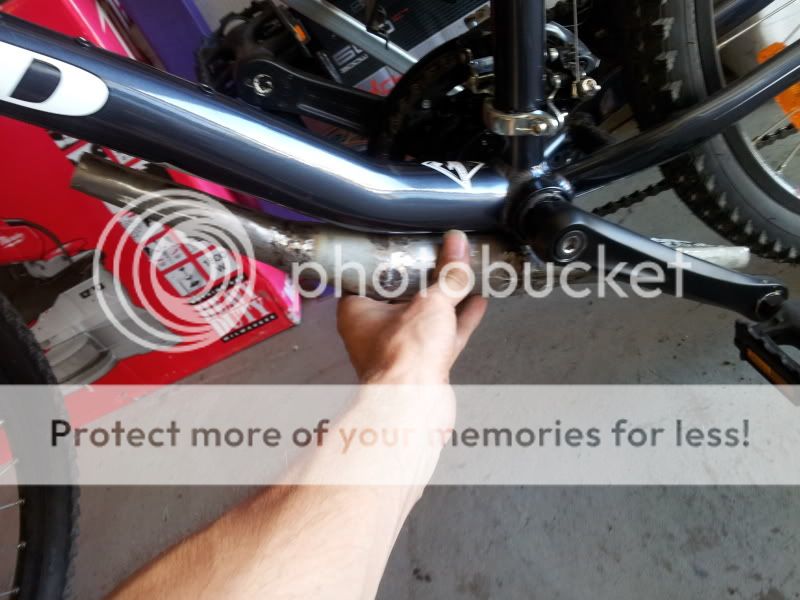
And here is where it will sit on the bike, i wanted it tucked right under to be nice and stealthy and hopefully not attract too much attention:
2012-12-29163034.jpg


It still needs lots of grinding and sanding to get it smooth before painting it so im thinking i might heat wrap it instead, will save lots of time sanding it smooth because it will cover any lumps and bumps where the welds arent quite smooth.


One last question, is the header length vital? because where i have it the header will be a fair bit shorter than the one on the plans, i can make it the right length if i have to but it will be much neater and easier if dont.
 
Back
Top