My Spoiler Project

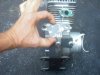
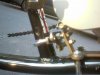
Bending the manifold

Hi if that is the aluminum manifold you will NOT bend it. It will crack, shatter or crumble, but certainly not bent. These catingss are very brittle,

Mike
 
Heat?

Mike, thanks for the head's up. How about with some heat? I finally got the motor in this weekend so now I have to deal with this situation. I have a couple of ideas that I was thinking about trying:

I) I will mount the manifold to a sturdy surface. With a propane torch heat up the manifold around the bend. I found another piece of tube that fits in perfectly over the end of the manifold (the end that attaches to the carb) to use as a tool in bending it. After heating up the manifold, I would slide this tube in over the end of the manifold to apply pressure in the direction I want it to bend. I only have to bend/twist the manifold about a quarter of an inch or less. If the bending does not happen easily, I will not force it because I don't want to destroy the manifold.

2) Use copper pipes and solder. I have a piece of copper pipe that would slide nicely into the end of the manifold and a 45 degree angle that would put the carb out of the way. Maybe too much heat for solder?

I'm going to post this in the Technical & Mechanical Help section as well


By the way, Dan, thanks for the offer. If I can't do this on my own, I will start searching for a fabrication place.

"Is there a fabrictaing place nearby? Maybe they could make one for you. Too bad you don't live closer, I would make an offset one for you."
 
Thanks you guys for the tips. IW, I didn't know that the frame is Aluminum, thanks. I really didn't like the idea of drilling holes and I saw enough pictures in here to get a good idea of how to solve the problem using clamps. Below are pictures of where I've decided to place the engine and the motor mount from below (notice off center location of engine). What I've decided to do is cut the piece of the engine mount that was meant to be clamped to the front/pedal post (picture below, piece to be cut off is between my fingers) and screw this to the back part of the mount so that I can clamp it to the seat post. I'll attach pictures as I'm doing so that it makes more sense.

have you attached your mounting bracket to your seat tube? your engine might try to tilt, under torque without it.
 
Recent Updates

So, I finally have the engine bolted down, the carburator in place and the rear sprocket mounted. This is what it's looking like:
 

Attachments

  • phase I left.JPG
    phase I left.JPG
    141.5 KB · Views: 265
Recent updates: Engine mount

I cut a piece of the engine mount off to use as plate to screw the U bolt around the seat post. I drilled matching holes into the cut piece and the rear end of the engine mount and bolted them together. This is as far up as I could get the clamp around the seat post mounted. I hope it's high enough to hold the engine in place and keep it from rotating from the torque. What do you think srdavo?
 

Attachments

  • cut.JPG
    cut.JPG
    133 KB · Views: 229
  • cut mount.JPG
    cut mount.JPG
    119.5 KB · Views: 212
  • top mount 1.JPG
    top mount 1.JPG
    123 KB · Views: 238
  • top mount 2.JPG
    top mount 2.JPG
    166.5 KB · Views: 227
  • top mount 3.JPG
    top mount 3.JPG
    182.5 KB · Views: 256
Last edited by a moderator:
Recent updates: carburator manifold

I ordered the steel manifold form that's DAX (thanks drimpact) and was able to bend it so that I was able to slide the carburator into place.
 

Attachments

  • carb above view.JPG
    carb above view.JPG
    204.5 KB · Views: 205
Update: Rear wheel

I mounted the sprocket adapter and sprocket to the wheel I found at the dump. I'm glad I went this way because it looks really solid (Forgetting the fact that I won't have rear brakes). Also, the sproket is in perfect line with the engine sproket. The engine mount and sproket adapter from livefast seem to work together well. The frame of the spoiler is a bit wider than that of the stingray, so the rear wheel sprocket rubbed against it. I had to place a few extra washer on the axle to get it over a bit.
 

Attachments

  • adapter inside.JPG
    adapter inside.JPG
    147.5 KB · Views: 245
  • sproket.JPG
    sproket.JPG
    168.5 KB · Views: 219
  • extra washer.JPG
    extra washer.JPG
    166 KB · Views: 215
Wow, youv'e come a long way.
Man, what a find at the dump. They don't let us go dump hopping over here due to insurance reasons.
Doc
 
Alaskavan, thanks for the compliment.

Doc, it was one of the biggest coincidences of my life! I wasn't sure how I was going to install the sproket and I go to the dump and bam, there's the part that I need. What are the chances of that! Too bad they don't let you hang at the dump, I always come back with something.
 
Back
Top