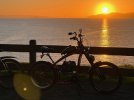
Hey guys, after recently introducing myself and my cruiser build, today I want to show you my first motorized bike. It is a Nirve Switchblade Chopper, 53cc - 4G 1B Grubee Engine with a jackshaft setup.

This is the bike I learned how to build a motorized bike with, which means a lot if trial and error. I am glad I finally got it dialed in. A milestone in this build was to understand that everything over 6800 RPM is redline and causes drastic vibrations. My bike kept falling apart until I learned this. Then, not being able to full throttle anymore (before I was doing over 9000 RPM to reach 30 MPH) I was looking in to a jackshaft conversion. I needed gears to reach max speed within a normal RPM range.
With the frame being a little unusual, no jackshaft kit out of the box would fit so I watched videos and learned basic metal working to start building my own.
Jackshaft

I found these fairly compact pillow bearings that I mounted to my motor mount plate. With SBP's 6" jackshaft and a 12 tooth 415 sprocket by staton inc, I was able to bring my engine power to the other side! From there it is like every other jackshaft conversion. I had to find a smaller left side sprocket just so the chain won't rub on my motor mount plate.


Rear Wheel
I had issues with my rear wheel since the rider of this bike sits so far back putting all the weight there. Combined with heavy vibrations before my jackshaft conversion, I just kept breaking spokes. I walked into a custom eBike shop with my steel 12g Husky wheel and my 5-Speed Sturmey Archer RXL-RD5 hub and and they built me this wheel. It is strong and stopped giving me s**t.
Saddle Suspension
My saddle suspension setup might look weird. But I kept bending my saddle posts. Due to the frame design it is pretty angled so I would side load the posts quite a bit with my weight - and every bump. When I got a suspension saddle post for my other bike, I saw that they have a big steel rod inside for the spring mechanism. I took the risk to see if that actually is stronger. Now also dampening impacts, it held up fine so far. The saddle shock absorber above I got myself to just soften my ride even more. It works!

Blinkers

These blinkers are really awesome. They are red in the back and white in the front when not in use, adding more visibility. I attached them with muffler exhaust clamps and some small fabricated mounts.
I then found myself leaving the blinkers on by accident so I built myself those blinker handlebar indicators with green LEDs.


In the second picture here, you can also see the USB charging ports that I recessed in that rubber grommet from the fork. It automatically keeps my GPS speedometer at a full charge, leaving one slot for my phone.

On the other side of the fork I relocated my charging port for my onboard battery, so I wouldn't have to reach underneath the motor mount plate and plug my charger in.
Fender and Kickstand

My rear fender was one of the things that vibrate-broke in the early stage. It originally went around the whole rear wheel with those flimsy wire mounts. I cut it in half and mounted it tightly and directly to the frame.

With more and more weight added to the bike, the stock bike stand just wasn't up for the job. I fabricated this mounting bracket to attach a heavy duty double leg kickstand.
Oil Barb Extension

Changing the oil literally sucked so I looked to make it easier to do that. I found a Thread-to-Barb adapter which I attached, then put a hose on and another adapter on the other end. It is tight with a brass plug and makes it so much easier to quickly change the oil. It is linked in the parts list below.
Wiring
The wiring was pretty cool to learn. I am running two patch cables down the down tube so I have 16 stranded wires which are just fine for all these little LEDs. Just for the Horn and my charging port I use thicker gauge wires.


It looks a bit messy, If I would do it again I would try to mount some sort of plastic hobby box or something and put everything in there. I never take this bike out in the rain though so it is fine.
With the wiring I learned how to use crimpers, ferrules, JST connectors and such. By the way, if you have to join wires for lights and things, learning about and how to use JST-SM connectors is a huge milestone. They are clean, polarized, lock in place and you can detach your wired item anytime.
I came from big soldered wire-blobs wrapped in gooey electrical tape to this. I can highly recommend.
By the way, I got this thing registered as a motorized bicycle in California. I always have the papers on me but I decided not to mount the license plate. If I do, I feel like I am acknowledging I don't belong on bike paths...
Upcoming projects
The exhaust is OK but I am looking in to bending my own steel pipe. I am thinking of some sort of straight pipe and muffler combo where I can switch with some sort of mechanism to muffled and loud. (Don't want to piss off my neighborhood) But still gathering ideas here...
I am leaving you this list of all my parts that I used, in case some of you are interested in some. It is mostly direct links to Amazon.
A motorized bike project is never done
Partslist
Bike and Frame
Nirve Switchblade
RXL-RD5 IGH with Drumbrake
Suspended Saddlepost
Saddle Shock Absorber
Pedals
Saddle
Shimano Hydraulic Brakes
Fork Leather Bag
Maxxis Hookworm 26" Tire
Ursus Jumbo Double Leg Kickstand
4L Gas Tank
Mirrors
Engine and Jackshaft
MBRebel Stretched Motor Mount
1-3/4in I.D.x 2in Wide Downtube Clamp
5/8 Bore Pillow Bearing
Grubee 53cc 4 Stroke Engine
Left side Sprocket, Staton Inc 415 B 12 Tooth Sprocket 5/8" ID with a 3/16" key way, two set screws
Chain Tensioners
Sick Bike Parts Chainring and Freewheel Parts, Cranks
Oil Screw Barb Adapter
Electrical
Techflex
Blinkers
Blinker Relay
Blinker Fork Mounts
Lights Front and Rear
2nd Light, Switch with Horn-(Kill)-switch
Colored LEDs 12V for Handlebar Indicator
Batterypack with Charger
GPS Speedometer
Tachometer with Temp Gauge
Blinker Handlebar Switch with Mirror Mount
6V Horn
5V-11V to 12V converter
Tools
Ferrule Crimping Tool Kit
JST SM Connectors (They are the best to do wiring on the bike)
JST Crimping Tool
Heat Shrink Tube Kit
This is the bike I learned how to build a motorized bike with, which means a lot if trial and error. I am glad I finally got it dialed in. A milestone in this build was to understand that everything over 6800 RPM is redline and causes drastic vibrations. My bike kept falling apart until I learned this. Then, not being able to full throttle anymore (before I was doing over 9000 RPM to reach 30 MPH) I was looking in to a jackshaft conversion. I needed gears to reach max speed within a normal RPM range.
With the frame being a little unusual, no jackshaft kit out of the box would fit so I watched videos and learned basic metal working to start building my own.
Jackshaft
I found these fairly compact pillow bearings that I mounted to my motor mount plate. With SBP's 6" jackshaft and a 12 tooth 415 sprocket by staton inc, I was able to bring my engine power to the other side! From there it is like every other jackshaft conversion. I had to find a smaller left side sprocket just so the chain won't rub on my motor mount plate.
Rear Wheel
I had issues with my rear wheel since the rider of this bike sits so far back putting all the weight there. Combined with heavy vibrations before my jackshaft conversion, I just kept breaking spokes. I walked into a custom eBike shop with my steel 12g Husky wheel and my 5-Speed Sturmey Archer RXL-RD5 hub and and they built me this wheel. It is strong and stopped giving me s**t.
Saddle Suspension
My saddle suspension setup might look weird. But I kept bending my saddle posts. Due to the frame design it is pretty angled so I would side load the posts quite a bit with my weight - and every bump. When I got a suspension saddle post for my other bike, I saw that they have a big steel rod inside for the spring mechanism. I took the risk to see if that actually is stronger. Now also dampening impacts, it held up fine so far. The saddle shock absorber above I got myself to just soften my ride even more. It works!
Blinkers
These blinkers are really awesome. They are red in the back and white in the front when not in use, adding more visibility. I attached them with muffler exhaust clamps and some small fabricated mounts.
I then found myself leaving the blinkers on by accident so I built myself those blinker handlebar indicators with green LEDs.
In the second picture here, you can also see the USB charging ports that I recessed in that rubber grommet from the fork. It automatically keeps my GPS speedometer at a full charge, leaving one slot for my phone.
On the other side of the fork I relocated my charging port for my onboard battery, so I wouldn't have to reach underneath the motor mount plate and plug my charger in.
Fender and Kickstand
My rear fender was one of the things that vibrate-broke in the early stage. It originally went around the whole rear wheel with those flimsy wire mounts. I cut it in half and mounted it tightly and directly to the frame.
With more and more weight added to the bike, the stock bike stand just wasn't up for the job. I fabricated this mounting bracket to attach a heavy duty double leg kickstand.
Oil Barb Extension
Changing the oil literally sucked so I looked to make it easier to do that. I found a Thread-to-Barb adapter which I attached, then put a hose on and another adapter on the other end. It is tight with a brass plug and makes it so much easier to quickly change the oil. It is linked in the parts list below.
Wiring
The wiring was pretty cool to learn. I am running two patch cables down the down tube so I have 16 stranded wires which are just fine for all these little LEDs. Just for the Horn and my charging port I use thicker gauge wires.
It looks a bit messy, If I would do it again I would try to mount some sort of plastic hobby box or something and put everything in there. I never take this bike out in the rain though so it is fine.
With the wiring I learned how to use crimpers, ferrules, JST connectors and such. By the way, if you have to join wires for lights and things, learning about and how to use JST-SM connectors is a huge milestone. They are clean, polarized, lock in place and you can detach your wired item anytime.
I came from big soldered wire-blobs wrapped in gooey electrical tape to this. I can highly recommend.
By the way, I got this thing registered as a motorized bicycle in California. I always have the papers on me but I decided not to mount the license plate. If I do, I feel like I am acknowledging I don't belong on bike paths...
Upcoming projects
- Paint the engine matte black
- Paint the wheel and hub black
- Better looking Exhaust
The exhaust is OK but I am looking in to bending my own steel pipe. I am thinking of some sort of straight pipe and muffler combo where I can switch with some sort of mechanism to muffled and loud. (Don't want to piss off my neighborhood) But still gathering ideas here...
I am leaving you this list of all my parts that I used, in case some of you are interested in some. It is mostly direct links to Amazon.
A motorized bike project is never done
Partslist
Bike and Frame
Nirve Switchblade
RXL-RD5 IGH with Drumbrake
Suspended Saddlepost
Saddle Shock Absorber
Pedals
Saddle
Shimano Hydraulic Brakes
Fork Leather Bag
Maxxis Hookworm 26" Tire
Ursus Jumbo Double Leg Kickstand
4L Gas Tank
Mirrors
Engine and Jackshaft
MBRebel Stretched Motor Mount
1-3/4in I.D.x 2in Wide Downtube Clamp
5/8 Bore Pillow Bearing
Grubee 53cc 4 Stroke Engine
Left side Sprocket, Staton Inc 415 B 12 Tooth Sprocket 5/8" ID with a 3/16" key way, two set screws
Chain Tensioners
Sick Bike Parts Chainring and Freewheel Parts, Cranks
Oil Screw Barb Adapter
Electrical
Techflex
Blinkers
Blinker Relay
Blinker Fork Mounts
Lights Front and Rear
2nd Light, Switch with Horn-(Kill)-switch
Colored LEDs 12V for Handlebar Indicator
Batterypack with Charger
GPS Speedometer
Tachometer with Temp Gauge
Blinker Handlebar Switch with Mirror Mount
6V Horn
5V-11V to 12V converter
Tools
Ferrule Crimping Tool Kit
JST SM Connectors (They are the best to do wiring on the bike)
JST Crimping Tool
Heat Shrink Tube Kit