Chainlube
Well-Known Member
Running lean, drop the clip on the needle jet one notch.

Sounds like an air leak.UPDATE: all the gaskets are replaced. Fresh gas and 32:1 mixture. Plus a brand new carb. It has stopped spraying gas everywhere but still not running quite right
It idles great with the choke on but rpm’s increase when choke is off and dies when I turn the throttle. Any ideas?
The clip was in the middle and I moved it 1 notch to the top. I totally had that backwards! I’ll give that a try when I have some timeRunning lean, drop the clip on the needle jet one notch.
That’s what I thought but when I spray with carb cleaner it doesn’t appear to be a leakSounds like an air leak.

 www.bikeberry.com
 www.bikeberry.com
 www.bikeberry.com
Thanks again Damien but I’m one step ahead of you. I already have screen shots of your instructions and already purchased those parts!! Haha! I know you have good info and build a solid bike so I buy what you buy!Don't forget, you may need these instructions I have made to get things on there and working right...I know what its like to be just futzing around trying to get things to fix so here is some of the benefits of my experience being passed on once again...lol.
I don't recommend this method on an aluminum frame because it would probably crack and break, but this is what i did on my Steel Frame Hyper Beach Cruiser to accomodate the rear sprocket and disk to fit within the dropouts and frame.
On my bike, (steel frame ONLY), i had to "stretch" the rear forks apart by hand, about 1/2 an inch to put the rear wheel with sprocket/rotor attached, and then use a spare 15MM axle nut on the sprocket/rotor inside of the drop down, threaded to the axle with blue locktite, to maintain that amount of "stretch" to accommodate the amount of of clearance space the rotor needs so as not to be pressed against the frame.
It helps to have a buddy with a strong pair of hands to help in this proceedure like I did...lol.
You will also need a freewheel sprocket for the pedal chain side of things as well and will probably need to add chain links to the pedal side as well since the freewheel is larger than the stock coaster brake pedal sprocket.
Ps...I also eliminated having to use a chain tensioner by cutting the drive side chain down to custom fit like a motorcycle chain when i also did the pedal side chain sizing so they are now both custom fit for the bike.
Sunlite Single Speed 22 Tooth Sprocket
The Sunlite Single Speed 22 Tooth Sprocket is what you need to eliminate any mods you need to make to a wheel, giving you a more secure rear wheel sprocket assembly.
A pair of these adaptors (2), one for the front, one for the rear, will also be necessary, or something like them since you may or may not be able to make your own frame to disk caliper adaptors as i have done.
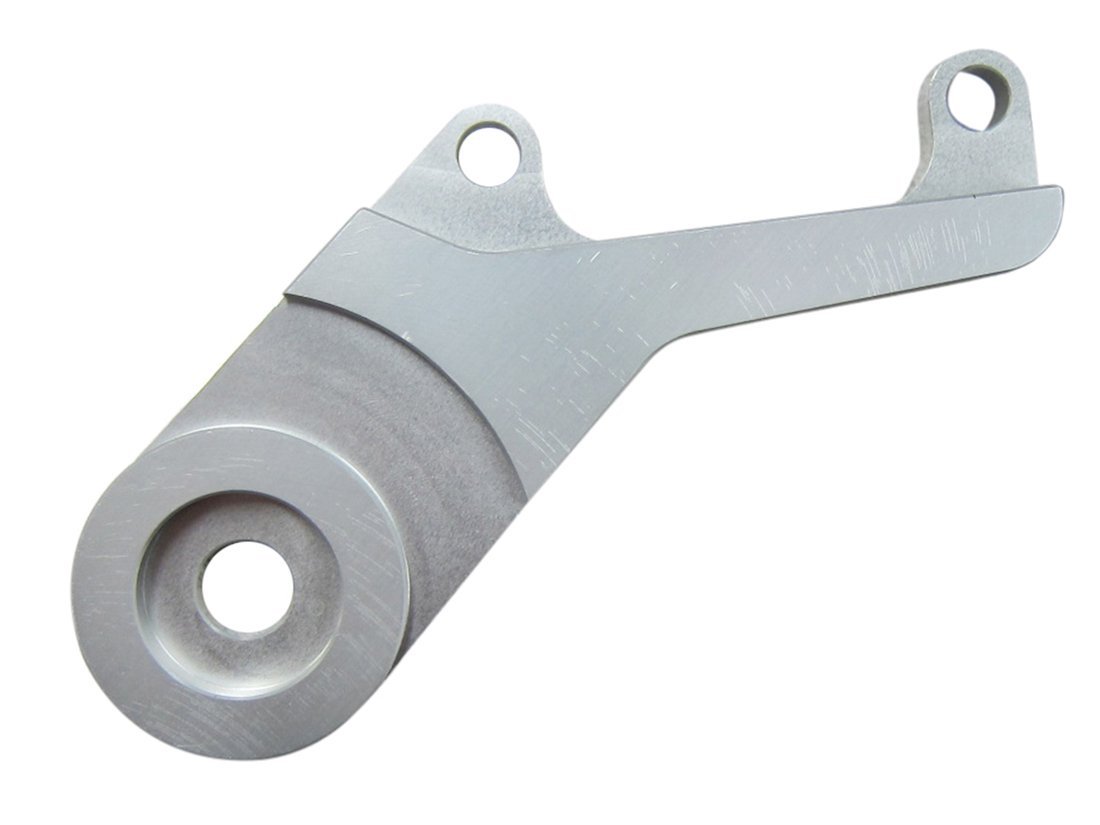
BBR Tuning Billet Aluminum Disc Brake Caliper Bracket
This works with motorized or standard bicycles and allows you to install a disk brake if you don't have the necessary mounts. No more rim or coaster brakes.
And a dual brake lever for the disk brakes since you already have the clutch lever taking up real estate on the left side of the handle bars...lol...also on sale for 10 bucks for the next 16 hours....You will need brake cables from your local bicycle shop as well to connect the brakes.
Sunlite Alloy Dual Brake Lever
The Sunlite Alloy Dual Brake Lever - operate your front and rear brakes with just one pull. Revolutionize your riding! Shop our selection today.
He custom built his own.Thanks again Damien but I’m one step ahead of you. I already have screen shots of your instructions and already purchased those parts!! Haha! I know you have good info and build a solid bike so I buy what you buy!
One question tho. The disk brake adaptor says it does not work with the dropouts that take the wheel from the bottom. I noticed you got it to work for your bike. My question is do I need to cut the fender mount holes to make this work?
I have the style on the left
One question tho. The disk brake adaptor says it does not work with the dropouts that take the wheel from the bottom. I noticed you got it to work for your bike. My question is do I need to cut the fender mount holes to make this work?
Gordy is correct...I made my own for both front and rear...lol.He custom built his own.
Oh ok. I thought you used the one from bikeberry. I’m gonna give it a go and see how it works. I may have to make it workGordy is correct...I made my own for both front and rear...lol.
I used 7075 T-6 aluminum for the rear and believe it or not, I used an Adel clamp from military aircraft to hold onto the front caliper adapter...They have been working flawlessly for three years now.
View attachment 192479
View attachment 192480
View attachment 192481
View attachment 192482
View attachment 192483
Exactly what I would be trying to do as well...But then, I'm a clever little monkey...lol...lol...I've never seen anyone use an Adel clamp for a frame to caliper adapter before, all I did was think out of the box was all.I may have to make it work
